
1,000 Octopuses (Octopi, Octopodes)

My newest project is to make 1,000 octopuses. I have always been fascinated with folding paper cranes for luck (senbazuru)... Legend has it that if you fold 1,000 cranes it will grant a wish or give you a lifetime of good fortune... Sadly origami has never been my forte.... but amigurumi* TOTALLY is.... I love to make finger puppets and toys and I often have small bits of yarn and a crochet hook on hand to whip up little things on the go.


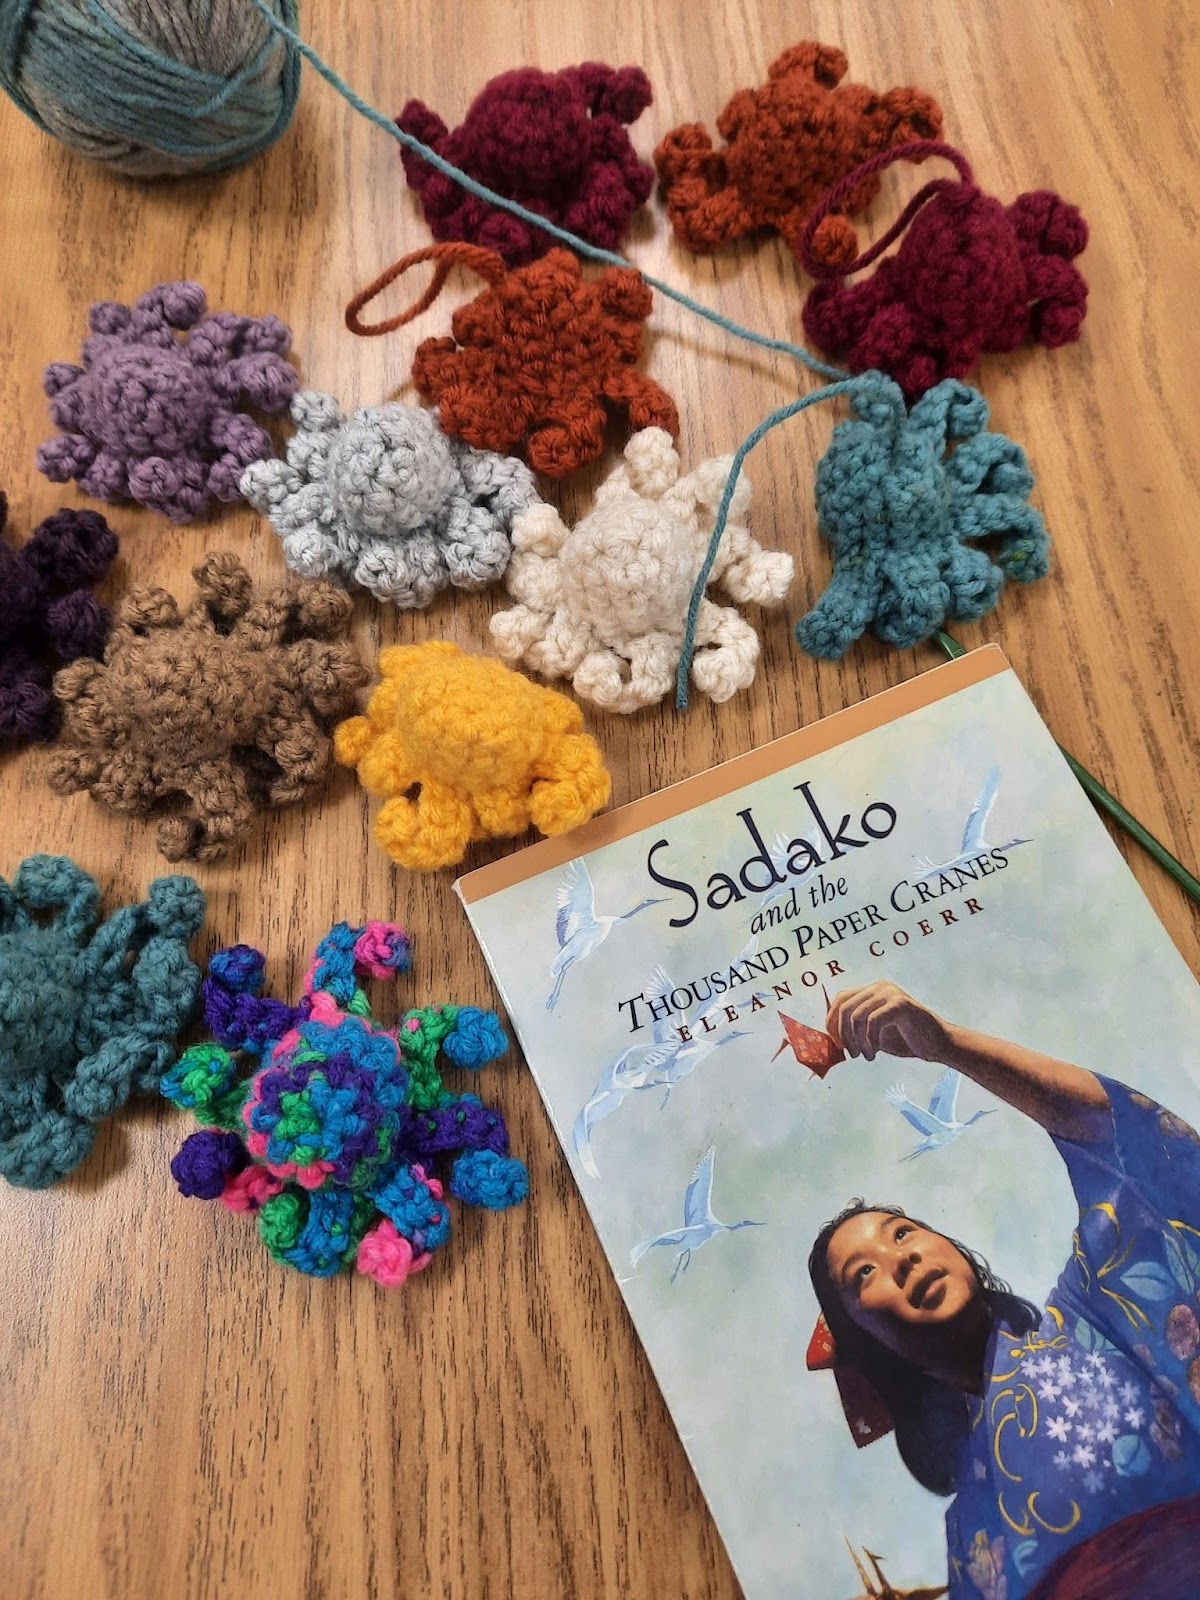
These little octopuses have been something I have been making for years... they are easy and quick to make (I can whip one up in about 10-15 minutes) and they are like little 8 legged mandalas. I am not sure where my 1,000 octopus journey will take me... but I know that the first 100 are going to become a part of a yarn sculpture that I am working on...Here is a sneak peak.


So far I am about 45 octopuses in to my 1,000... I am not sure that I will have them done by the end of 2025... but I plan on doing them as a series of smaller projects... the first one is a momma and her babies and I would like to have it finished by mid February at the latest...I am using acrylic yarn that I my kids found second hand... Not a huge fan of acrylics for clothing or blankets but they are sturdy and perfect for this project.


Here is my Octopus finger puppet pattern again for anyone that wants to crochet along with me! If you are on Ravelry then "cast on" through my Ravelry project page so I can see your finished creations.


Octopus Finger Puppet


Stitches:

Ch - Chain

Sl st - slip stitch

SC - Single Crochet

Inc - Single crochet 2 stitches into one

SC 2tog - Single crochet two stitches together


Materials:

F hook

worsted weight yarn (I used cotton)

tapestry needle


Instructions:

Round 1: SC 6 stitches into a magic ring. Pull tight (6)

Round 2: *SC, Inc* repeat 3 times to complete round (9)

Round 3: *SC, SC, Inc* repeat 3 times to complete round (12)

Round 4 and 5: SC in each stitch around (12)

Round 6: *SC, SC 2 tog* repeat 4 times to complete round (8)

Round 7: *SC into next stitch, ch 8, SC into second stitch from the hook and the remaining 6 stitches* repeat this 8 times to make the legs. Sl st into the first stitch of the first leg and fasten off.

Weave in ends and sew two eyes


* According to Wikipedia amigurumi is: (Japanese: 編みぐるみ, lit. "crocheted or knitted stuffed toy") is the Japanese art of knitting or crocheting small, stuffed yarn creatures. The word is a compound of the Japanese words 編み ami, meaning "crocheted or knitted", and 包み kurumi, literally "wrapping", as in 縫い包み nuigurumi "(sewn) stuffed doll")

Comments

Popular posts from this blog

Spring Break Frisbee

I created this pattern while sitting next to the campfire during spring break. I made several of them... they didn't take anytime at all. I found that a 100% cotton yarn like Lily's sugar and cream or the Walmart Peaches and Cream yarn worked best. On some attempts I used a slightly higher quality cotton yarn and found that the finished product was not as stiff and therefor didn't fly as well...they still worked great, however, so by all means use what you have. I haven't tried making this pattern with any other type of yarn although I'm sure it would work great. These frisbees are great indoors or out. Size K crochet hook 2 balls of worsted weight yarn (100% cotton dish cloth quality works best) tapestry needle Round 1: Holding 2 strands together and using the K hook use the magic ring method to SC 6 into the ring. Round 2: 2 SC into each of the 6 stitches (12 st) Round 3: *SC into next SC, 2 SC into next SC* repeat around (18 st) Round 4: *SC into next 2 SC, 2 ...

New Pattern: Octopus Finger Puppet

Materials F hook worsted weight yarn (I used cotton) tapestry needle Stitches: Ch - Chain Sl st - slip stitch SC - Single Crochet Inc - Single crochet 2 stitches into one SC 2tog - Single crochet two stitches together Round 1: SC 6 stitches into a magic ring. Pull tight (6) Round 2: *SC, Inc* repeat 3 times to complete round (9) Round 3: *SC, SC, Inc* repeat 3 times to complete round (12) Round 4 and 5: SC in each stitch around (12) Round 6: *SC, SC 2 tog* repeat 4 times to complete round (8) Round 7: *SC into next stitch, ch 8, SC into second stitch from the hook and the remaining 6 stitches* repeat this 8 times to make the legs. Sl st into the first stitch of the first leg and fasten off. Weave in ends and sew two eyes.

New Pattern: Mini Flyer

This is simply a smaller version of my Spring Break Frisbee . I wanted to make something small that would fit into medium size geocache containers and yet still fly. This is what I came up with. You can use two strands of any worsted weight yarn. I made my sample projects with cotton, but feel free to experiment with other fibers. This cute little flyer fits into the palm of your hand and can still fly as far as it's big brother. It is a fast little project... and if your dog won't fetch it... it would make a fine beret for a smaller breed. You can make this in a single color by holding two strands of the same color together, but I prefer the look of two color. It is also an excellent way to remove the cob webs from those hard to reach corners... just aim and let it fly! For this project you'll need: Size K hook 2 worsted weight yarns. Tapestry needle for weaving in the ends Round 1: Holding 2 strands together and using the K hook use the magic ring method to SC 6 int...